Unity-PICO-共享空间锚点开发

Unity开发MR中应用空间锚点的场景
- 多人联机游戏需要对齐玩家元素(位置、物体位置等)
- 将物体持久化在某个现实对应的地方
- 没有大空间技术的普通消费级PICO头显设备MR玩家的同步
官方对于空间锚点的定义
1.自身坐标的正确标定
在开始应用空间锚点之前,我们需要先将自身的坐标真实确定,比如身高1.7m,在你头显里面的坐标也应该贴近(x,1.7,x)
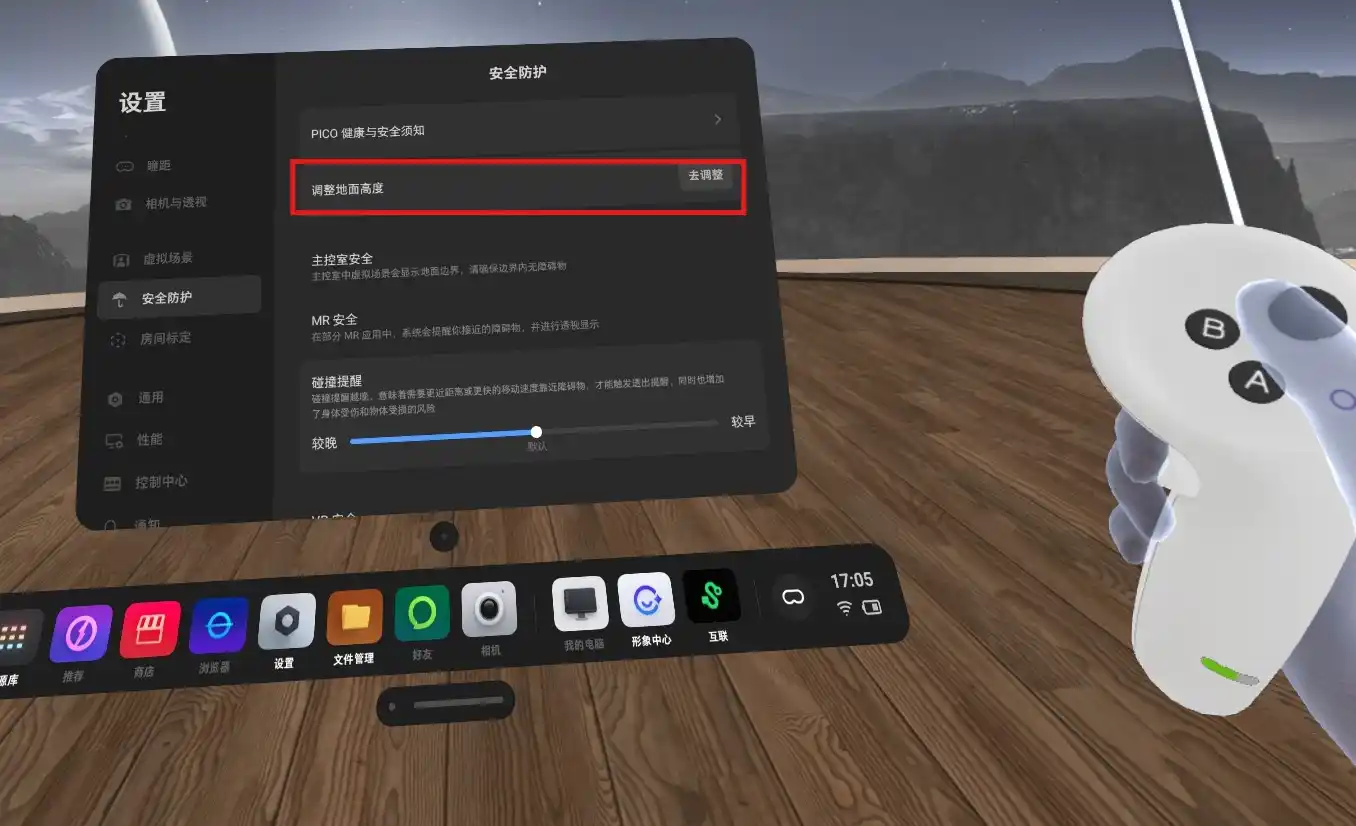
- 房间标定,查看官方
- 地面标定,位于PICO头显的设置-安全防护-调整地面高度
2.核心难点:多人开发的坐标系的统一与区分
- 每台PICO都有其独立的本地坐标系,而我们MR不同于VR的难点在于如何将两台及以上的坐标系统一起来;即虚拟坐标系(Coordinate System)统一到同一个物理参考系中
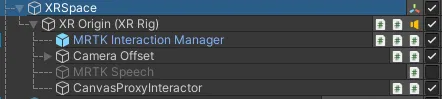
- 初期解决方法:我们通过手动标定自己的原点(XZ)来完成虚拟与现实的统一,但是及其考研玩家的现实校准的地方的一致性,不方便;基本的核心原理都是将XROrigin置于一个根Root下进行变换
手动标定代码
/// <summary> /// 标定入口 /// </summary> public void OnCalibrateOriginPressed() { if (userCamera == null) { SetLogInfo("错误:无法找到用户相机,无法进行标定!"); return; }
SetLogInfo("正在根据当前玩家位置标定共享原点...");
// 1. 获取玩家头显在地板上的投影位置(Y=0) Vector3 headPositionOnFloor = new Vector3(userCamera.position.x, 0, userCamera.position.z);
// 2. 获取玩家头显的水平朝向(忽略俯仰和侧倾) Quaternion headYawRotation = Quaternion.Euler(0, userCamera.eulerAngles.y, 0);
// 3. [核心] 调用对齐方法,传入我们计算出的、理想化的玩家姿态 // 这个方法会计算一个逆向变换,将这个姿态“拉回”到世界的(0,0,0) AlignSharedSpaceOrigin(headPositionOnFloor, headYawRotation); } /// <summary> /// 坐标系的统一变换 /// </summary> /// <param name="targetPosition">目标位置</param> /// <param name="targetRotation">目标旋转</param> private void AlignSharedSpaceOrigin(Vector3 targetPosition, Quaternion targetRotation) { if (xrSharedSpaceOrigin == null) { Debug.LogError("XR Shared Space Origin 未在Inspector中指定,无法对齐坐标系!"); return; }
// 计算将 targetPosition 和 targetRotation “拉回”到世界原点(0,0,0)所需的逆向变换 Quaternion inverseRotation = Quaternion.Inverse(targetRotation); Vector3 inversePosition = inverseRotation * -targetPosition;
// 将这个逆向变换应用到玩家的根节点上 xrSharedSpaceOrigin.SetPositionAndRotation(inversePosition, inverseRotation);
SetLogInfo("共享原点已成功标定!"); }以上的手动标定方案及其依赖双方对齐时的高度(因为这是是一个完全重设世界0点坐标系的过程),不精准,不稳定,只能作为开发过渡
3.空间锚点基本
对于空间锚点的基本应用(放置、持久化、销毁等)我的建议是多去研究上面那个官方基本文档,我这里碍于篇幅,只会提供不易发现,被垄断的部分,不过还是要注意以下几点核心
- 老老实实走PICO云端的方案,尽量不要尝试锚点数据走本地(因为其中的点云数据是加密的,解密成本高,不值)
- 锚点的主要传输依赖核心就是uuid,请在你的联机方案中重点聚焦于uuid的传输,放置、销毁、持久化均高度依赖uuid;
- 锚点的预制体一定要附带PXR_Spatial Anchor脚本
- 放置方面,更建议以手柄位置作为放置点,放置前的视觉预览体记得去掉(PXR_Spatial Anchor脚本)
4.共享空间锚点
1.流程
流程建议为联机-放置共享空间锚点-下载客户端-同步
流程图
sequenceDiagram participant Host as 房主 (Host) participant Server as PICO Cloud participant Net as Network (RPC) participant Client as 客户端 (Client)
Note over Host: 1. 放置 & 创建锚点 Host->>Server: UploadSpatialAnchor Server-->>Host: 返回 UUID Host->>Host: 记录 P_Host, Q_Host
Note over Client: 2. 新玩家加入 (OnNetworkSpawn) Client->>Host: RequestAnchorData (ServerRpc) Host-->>Client: 发送 UUID, P_Host, Q_Host (ClientRpc)
Note over Client: 3. 对齐流程 Client->>Server: Download (UUID) Server-->>Client: 锚点数据 Client->>Client: Locate (获取 P_Client) Client->>Client: 计算 Offset (忽略Y轴) Client->>Client: 移动 XR Origin2.详细解析
详细解析
-
主机创建:房主记录下该锚点在自己坐标系下的位置 和旋转 。
-
客机加入:通过 ClientRPC 拿到 与 ,然后再下载共享的空间锚点(已上传到云)。
-
加载锚点:获取其在自己本地坐标系的位置 与旋转 ,然后经过数学矩阵变换后移动 XROrigin 的父物体 Root 节点即可。
-
变换计算:我们需要计算一个变换矩阵 。
- :锚点在房主世界空间中的位置和旋转。
- :锚点在客户端本地空间中的位置和旋转(未校准前)。
- :给客户端的旋转矫正。
- :给客户端的位置矫正。
-
旋转对齐:对齐水平朝向(Yaw),必须忽略 X/Z 轴的倾斜,以保证重力方向永远垂直向下。
1. 提取 Yaw 旋转 对于任一旋转四元数 ,其 Forward 向量在水平面上的投影为: 提取后的 Yaw 旋转为: 房主与客户端均这样处理,得到 和 。
2. 计算旋转差值 需要一个旋转 ,使得客户端旋转后等于房主的旋转: 推导得出:
代码对应:
Quaternion rotAlign = hostRot * Quaternion.Inverse(clientRot);
- 位置对齐:客户端锚点被父物体变换后,位置应等于房主锚点的位置。 公式推导: 其中 是将客户端的锚点位置进行旋转矫正。 需要求 ,移项可得:
代码对应:
Vector3 posAlign = hostPos - rotAlign * clientPos;
- 地面模式修正:虽然公式中得出了一定的 Y 轴数学解,但通常由地面标定误差引起,且我们采用
TrackingOriginMode.Floor,故丢弃 Y 轴偏移。 公式对应:
代码对应:posAlign.y = 0f;
- 玩家数据模拟
数学矩阵推演
-
房主锚点:,朝向 Yaw = 30°
-
客户端锚点:,朝向 Yaw = 10°
-
Yaw 旋转矩阵: 房主为: 客户端为:
-
旋转对齐矩阵:
代码:
Quaternion rotAlign = hostRot * Quaternion.Inverse(clientRot); -
平移向量 :
-
4×4 齐次变换矩阵 :
总结:经过 变换后,客户端观测到的锚点将完美对齐到房主的位置。
代码实现:
xrSharedSpaceOrigin.SetPositionAndRotation(_currentAlignPos, _currentAlignRot);
3.详细代码(需要适配你的网络架构等我是NGO)
具体代码
/// <summary> /// 执行空间对齐算法 /// </summary> /// <param name="hostPos">房主发来的锚点世界坐标</param> /// <param name="hostRot">房主发来的锚点世界旋转</param> /// <param name="clientPos">客户端本地读取到的锚点坐标</param> /// <param name="clientRot">客户端本地读取到的锚点旋转</param> private void ApplyAlignment(Vector3 hostPos, Quaternion hostRot, Vector3 clientPos, Quaternion clientRot) { // 1. 提取 Yaw (保持重力垂直) if (yawOnly) { hostRot = ExtractYaw(hostRot); clientRot = ExtractYaw(clientRot); }
// 2. 计算旋转偏移 Quaternion rotAlign = hostRot * Quaternion.Inverse(clientRot);
// 3. 计算位置偏移 (Host - Rot * Client) Vector3 posAlign = hostPos - rotAlign * clientPos;
// 既然双方都是 Floor 模式,XR Origin 的 Y 轴必须与物理地面重合,也就是必须为 0。 // 任何 Y 轴的偏移都会导致玩家浮空或陷地。 // 我们完全忽略锚点在高度上的测量误差,只信任 X, Z 和 旋转。 posAlign.y = 0f;
// 4. 平滑应用 if (_hasCurrentAlign && alignLerp < 1f) { _currentAlignRot = Quaternion.Slerp(_currentAlignRot, rotAlign, alignLerp); _currentAlignPos = Vector3.Lerp(_currentAlignPos, posAlign, alignLerp); } else { _currentAlignRot = rotAlign; _currentAlignPos = posAlign; _hasCurrentAlign = true; }
if (xrSharedSpaceOrigin != null) { xrSharedSpaceOrigin.SetPositionAndRotation(_currentAlignPos, _currentAlignRot); }
// 调试日志 float heightCorrection = hostPos.y - clientPos.y; // 如果这个值很大(比如 > 0.2),说明其中一人的地面标定严重错误,需要重置系统边界 Debug.Log($"[Align] 已强制锁定地面。忽略的高度误差: {heightCorrection:F3}m"); }4.辅助检验代码
代码
using UnityEngine;using TMPro;using Unity.XR.PXR;using Unity.Netcode;
public class DebugInfoManager : MonoBehaviour{ [Header("UI 设置")] [Tooltip("拖入用于显示坐标信息的 TextMeshProUGUI")] public TextMeshProUGUI debugText;
[Header("对象引用")] public Transform headCamera; // 拖入 Main Camera public Transform xrOriginParent; // 拖入 XR_SHARED_SPACE (XR Origin的父物体)
private void Update() { if (debugText == null) return; if (headCamera == null) headCamera = Camera.main?.transform;
System.Text.StringBuilder sb = new System.Text.StringBuilder();
// 1. 身份信息 string role = "未连接"; if (NetworkManager.Singleton != null && NetworkManager.Singleton.IsListening) { role = NetworkManager.Singleton.IsServer ? "房主 (Host)" : "玩家 (Client)"; } sb.AppendLine($"身份: <color=yellow>{role}</color>");
// 2. 关键坐标 (World) // 如果这个 Y > 2.0,说明你被错误的对齐逻辑抬飞了 Vector3 worldPos = headCamera != null ? headCamera.position : Vector3.zero; sb.AppendLine($"World Head: {FormatVec(worldPos)}");
// 3. 本地坐标 (Local - 相对于 Origin) // 正常站立时,Y 应该在 1.6 ~ 1.8 之间 (Floor模式) Vector3 localPos = headCamera != null ? headCamera.localPosition : Vector3.zero; sb.AppendLine($"Local Head: {FormatVec(localPos)}");
// 4. 原点偏移 (XR Origin) // Client 的 Y 必须是 0.00,如果不是,说明对齐逻辑错了 if (xrOriginParent != null) { sb.AppendLine($"Origin Pos: {FormatVec(xrOriginParent.position)}"); sb.AppendLine($"Origin Rot: {xrOriginParent.eulerAngles.y:F1}°"); }
// 5. 锚点误差监控 (从 Manager 获取) if (PXRSample_SpatialAnchorManager.Instance != null && PXRSample_SpatialAnchorManager.Instance.isCalibrated) { sb.AppendLine("<color=green>[已对齐]</color>"); } else { sb.AppendLine("<color=red>[未对齐]</color>"); }
debugText.text = sb.ToString(); }
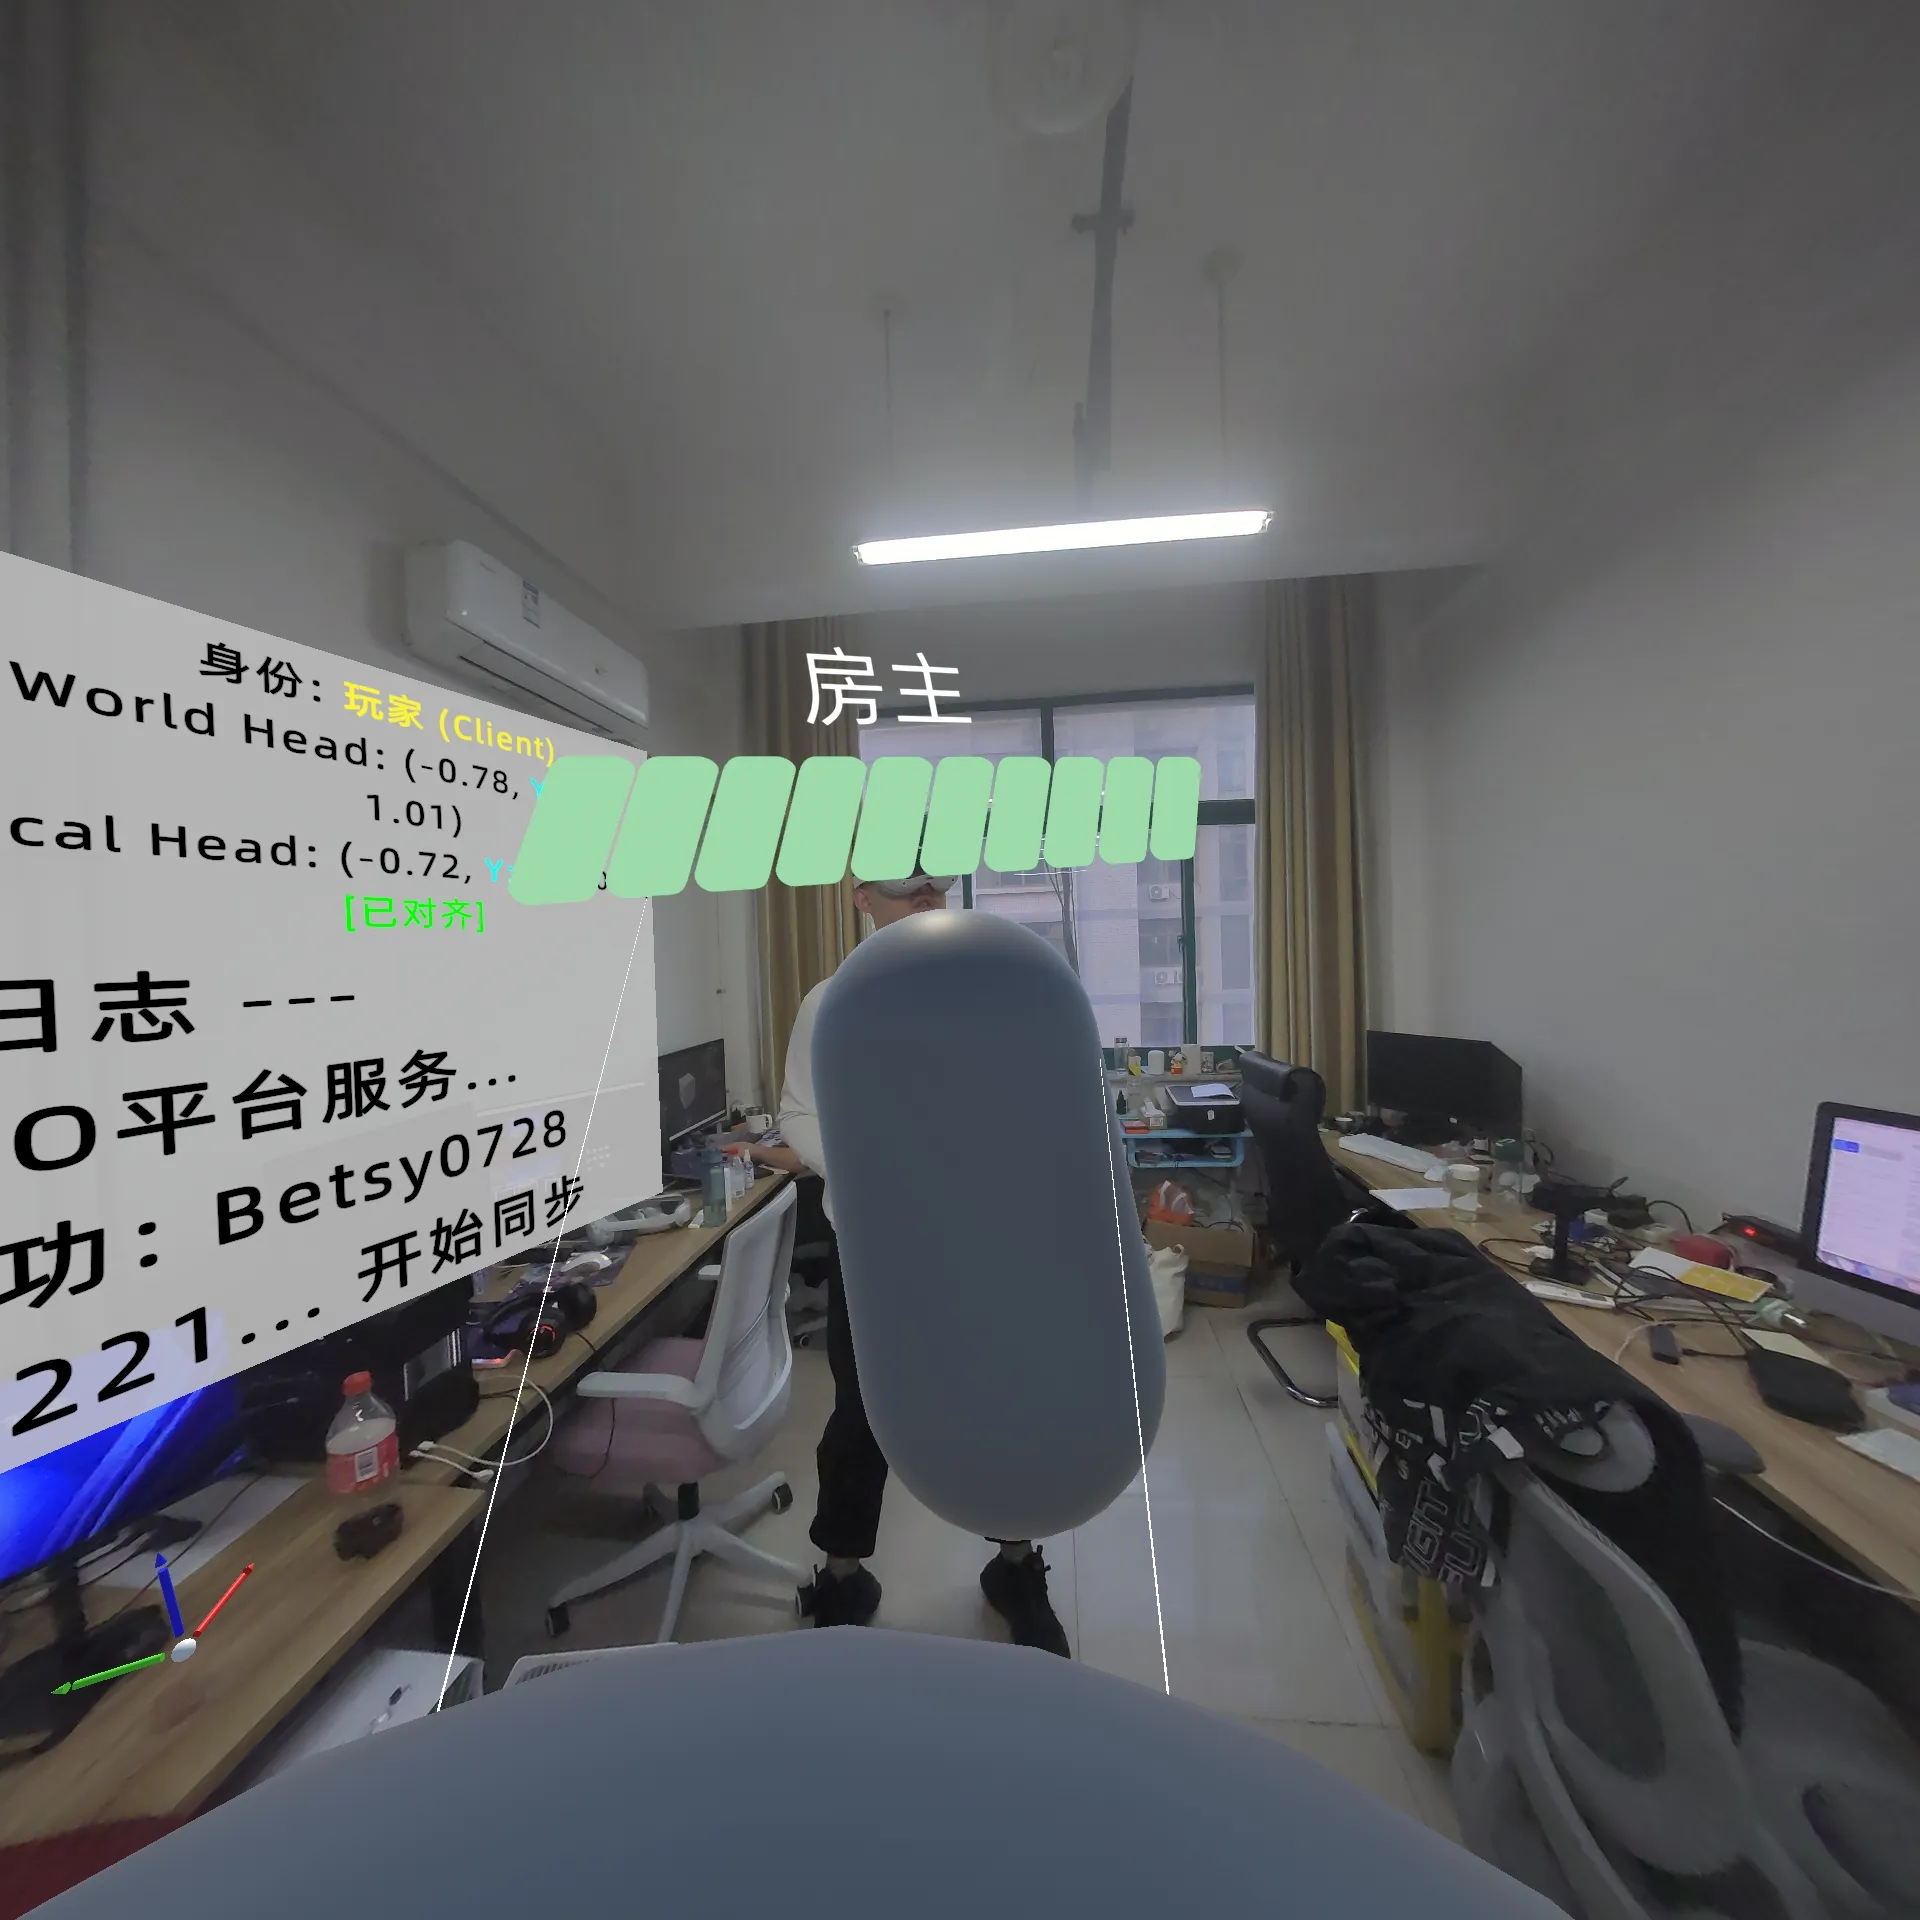
private string FormatVec(Vector3 v) { // X, Y, Z (保留2位小数) return $"({v.x:F2}, <color=#00FFFF>Y:{v.y:F2}</color>, {v.z:F2})"; }}5.简单的完美同步
基本实现:现实=虚拟,虚实合一
请注意房主再放置锚点后要细细观察锚点周围的空间,尽量保持平稳角度,确保上传是缓慢进行的,一般一下子上传完成均不准;客户端在确认房主上传完毕后请仔细以房主视角观察
RSS / 网站地图 / 关于 & 隐私政策
由 Astro 和 Fuwari 强力驱动
本网站代码 已开源
 辽ICP备2026001215号
  辽公网安备21070202000153号